Chapter 11 Bidirectional Communication
Shiny is the web framework of choice for the R programming language. Since JavaScript and Shiny both run in web browsers it follows that they can run alongside one another as one can include JavaScript in such applications. However, often disregarded is the ability for Shiny’s R server to communicate to the front end and vice versa. This collection of chapters aims to show precisely how this works. In this first part, we brush up on the essentials, so we understand how to include JavaScript in shiny applications.
Then again, the goal is not to write a lot of convoluted JavaScript. On the contrary, with little knowledge of the language the aim is to write as little as possible but demonstrate to the reader that it is often enough to vastly improve the user experience of Shiny applications.
11.1 WebSocket an Shiny
Shiny applications have two components: the user interface (UI) and the server function. These two components communicate via a WebSocket: a persistent connection that allows passing messages between the server and clients connecting to it. In the R server, this connection is managed by Shiny using the httpuv (Cheng and Chang 2021) and WebSocket (Chang, Cheng, Dipert, et al. 2021) packages, while in clients connecting to the server this connection is managed with JavaScript, as depicted in 11.1.
FIGURE 11.1: Websocket visualised
With that in mind, we can put together a Shiny application, which though simple. Exploits bi-directional communication. The application takes a text input, sends the value of the input to the R server, which sends it back to the UI.
library(shiny)

ui <- fluidPage(
  textInput("nameInput", "Your name"),
  textOutput("nameOutput")
)

server <- function(input, output) {
  output$nameOutput <- renderText({
    input$nameInput
  })
}

shinyApp(ui, server)
Drawing a diagram of the communication between the UI and the server (Figure 11.2) reveals that though this is a simple application a lot is happening.
FIGURE 11.2: Shiny websocket visualised
Communicating between the R server and the user interface requires JavaScript and thus makes a reasonable chunk of this part of the book on web development with Shiny.
11.2 Sessions
Note that shiny isolate each client connecting to the server in what it refers to as “sessions.” This means that when a user visits a shiny application and interacts with the inputs, like clicking a button, or moving a slider this only happens for their session, in their browser, and not in any other users’.
It would indeed be strange if when one of two concurrent users enters text in a box and that is reflected on the other user’s screen.
This is good to know because WebSocket are in fact often use for precisely that effect. For instance, in a chat application where someone posting a message to a group chat is sent to the server which then, via the WebSocket, broadcasts the message to all other users in the group chat.
Shiny does not allow this, users are isolated from one another.
11.3 Alerts, an example
Let us exploit an external library to demonstrate how this works: jBox allows displaying “notices,” similar to vanilla JavaScript alerts but much better looking and with additional functionalities.
The grand scheme is to build an application that displays a notification at the click of an actionButton and “tells” the server when it is closed. Though the introduction of this book includes best practices on how to include dependencies and JavaScript files, much of that will be disregarded in this section (and only in this section). That is only so it does not get in the way of explaining bidirectional communication through the WebSocket in Shiny.
Moreover, the jBox library comes with numerous features to display tooltips, modals, notices, and more, which would make for too long a chapter; only notices shall be covered here. Let us first take a look at the code that generates a jBox notice.
11.3.1 Explore
Below we build an elementary example that features jBox in HTML; it includes the dependencies and a short script that displays a notification when the page is loaded.
<!DOCTYPE html>
<html xmlns="http://www.w3.org/1999/xhtml" lang="" xml:lang="">
<head>
<script
  src="https://code.jquery.com/jquery-3.5.1.min.js">
  </script>
<script
  src="https://cdn.jsdelivr.net/gh/StephanWagner/jBox@v1.2.0/
    dist/jBox.all.min.js">
</script>
<link
  href="https://cdn.jsdelivr.net/gh/StephanWagner/jBox@v1.2.0/
    dist/jBox.all.min.css"
  rel="stylesheet">
</head>

<body>
  <!-- Script to show a notification -->
  <script>
    new jBox('Notice', {
      content: 'Hurray! A notice!'
    });
  </script>
</body>
</html>
The very first thing one should do is recreate this basic example in Shiny so that when the app is loaded the notification appears, we will make this work with the bidirectional WebSocket communication afterwards. The “j” in jBox stands for jQuery, which is already a dependency of Shiny itself. There is, therefore, no need to import it; on the contrary one should not in order to avoid clashes.
library(shiny)

ui <- fluidPage(
  tags$head(
    tags$script(
      src = paste0(
        "https://cdn.jsdelivr.net/gh/StephanWagner/",
        "jBox@v1.2.0/dist/jBox.all.min.js"
      )
    ),
    tags$link(
      rel = "stylesheet",
      href = paste0(
        "https://cdn.jsdelivr.net/gh/StephanWagner/",
        "jBox@v1.2.0/dist/jBox.all.min.css"
      )
    )
  ),
  tags$script("
    new jBox('Notice', {
      content: 'Hurray! A notice!'
    });"
  )
)

server <- function(input, output) {}

shinyApp(ui, server)
FIGURE 11.3: A basic jBox notice
Figure 11.3, and the application above essentially reproduce the basic HTML example that was shared; the dependencies are imported, and a script displays a notification. Since all of that takes place in the front end, the body of the server function is empty.
11.3.2 From R to JavaScript
Now that we have a simple notice displayed in the application we can tie it with the R server the alert should display a message sent by the R server. This would enable more dynamic messages, such as displaying a message taken from a database or a user input. As might be expected, there are two functions required to do so: an R function and its JavaScript complementary. One sends the data from the server and another catches said data in the client and displays the notice.
Let us start by writing the R code to send the data—thankfully very little is required of the developer. One can send data from the R server to the client from the session object using the sendCustomMessage method. Note that being a method of the session object implies that this message will only be sent to said session: only the client connected to that session will receive the message.
The sendCustomMessage method takes two arguments: first an identifier (type), second the actual data to send to JavaScript (message). The identifier passed first will be necessary JavaScript-side to “catch” that message and show the notice.
server <- function(input, output, session){
  # set the identifier to send-notice
  session$sendCustomMessage(
    type = "send-notice", message = "Hi there!"
  )
}
So while the above sends the message to JavaScript through the WebSocket, nothing is yet to be done with that message once it arrives in the client. We can add a “handler” for the identifier we defined (send-notice) which will do something with the message we sent from the server. This is done with the addCustomMessageHandler method from the Shiny object, where the first argument is the identifier and the second is the function that handles the message, a function that takes a single argument: the data sent from the server.
Below we add the handler for messages of type send-notice; the handler itself is a function that accepts the messages that were sent from the server and uses it to generate the notice via jBox.
tags$script(
  "Shiny.addCustomMessageHandler(
    type = 'send-notice', function(message) {
      new jBox('Notice', {
        content: message
      });
  });"
)
This effectively enables passing a message that is taken from a database, for instance, or as shown below from a user input, to the front end, which generates a notice.
library(shiny)

ui <- fluidPage(
  tags$head(
    tags$script(
      src = paste0(
        "https://cdn.jsdelivr.net/gh/StephanWagner/",
        "jBox@v1.2.0/dist/jBox.all.min.js"
      )
    ),
    tags$link(
      rel = "stylesheet",
      href = paste0(
        "https://cdn.jsdelivr.net/gh/StephanWagner/",
        "jBox@v1.2.0/dist/jBox.all.min.css"
      )
    )
  ),
  textInput("msg", "notice"),
  actionButton("notify", "Notify myself"),
  tags$script(
    "Shiny.addCustomMessageHandler(
      type = 'send-notice', function(message) {
        new jBox('Notice', {
          content: message
        });
    });"
  )
)

server <- function(input, output, session) {

  observeEvent(input$notify, {
    session$sendCustomMessage(
      type = "send-notice", message = input$msg
    )
  })

}

shinyApp(ui, server)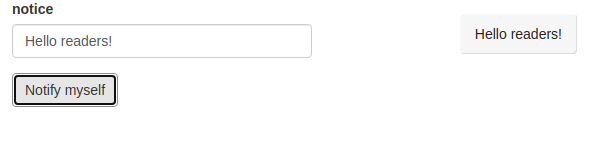
FIGURE 11.4: A notice triggered by the server
In the previous application that produces Figure 11.5, notice the path that the message follows: it goes from the client (user input) to the server (observeEvent), which sends (sendCustomMessage) it back to the client.
FIGURE 11.5: Shiny alert with custom messages
This might be considered suboptimal by some as it is not necessary to use the server as an intermediary (in this example at least). Though there is some truth to this, the above will work perfectly fine—and the aim here is to make JavaScript work with R—not alongside it. The WebSocket is very efficient, and this will not have much overhead at all.
11.3.3 Serialisation
Let us delve deeper into the data that is sent from the server to the front end to understand how we can further customise the notice displayed, e.g., change the colour.
The jBox notice is configured using a JSON object containing the options that define said notice to display (example above), including but not limited to the message. The most straightforward way to make all those options accessible to the server is to construct that list of options server-side before sending it to the front end. For instance, the JSON of options displayed above would look like the R list below.
options <- list(
  content = 'Hurray! A notice!',
  color = 'red'
)
jsonlite::toJSON(options, pretty = TRUE, auto_unbox = TRUE)
#> {
#>   "content": "Hurray! A notice!",
#>   "color": "red"
#> }
Therefore, one could construct this list server-side and use it in jBox straight-away. Doing so means the JavaScript code can be simplified to new jBox('Notice', message); and produce Figure 11.6.
library(shiny)

ui <- fluidPage(
  tags$head(
    tags$script(
      src = paste0(
        "https://cdn.jsdelivr.net/gh/StephanWagner/",
        "jBox@v1.2.0/dist/jBox.all.min.js"
      )
    ),
    tags$link(
      rel = "stylesheet",
      href = paste0(
        "https://cdn.jsdelivr.net/gh/StephanWagner/",
        "jBox@v1.2.0/dist/jBox.all.min.css"
      )
    ),
    tags$script("Shiny.addCustomMessageHandler(
      type = 'send-notice', function(message) {
        // use notice send from the server
        new jBox('Notice', message);
    });")
  )
)

server <- function(input, output, session){
  # define notice options
  notice = list(
    content = 'Hello from the server',
    color = 'black'
  )
  # send the notice
  session$sendCustomMessage(
    type = "send-notice", message = notice
  )
}

shinyApp(ui, server)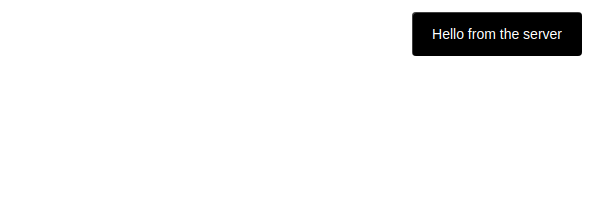
FIGURE 11.6: Customised jBox notice
11.3.4 JavaScript to R
Thus far we have covered how to pass data from the R server to JavaScript in order to display a notification, but we have yet to make the data travel the other way: from JavaScript to R. In this example, we would like to send data from JavaScript to R when the notice is closed (either by itself or the user).
One ubiquitous way that such feedback is enabled in JavaScript is through events and callback functions, which are triggered upon an action being performed by the user (like the click of a button) or when other interesting things happen in the code. jBox provides numerous such events so functions can be used when a modal is created or when a notice is closed, for instance.
The concept of the callback function is not totally foreign to R, albeit rarely used. For instance, Shiny comes with this feature, shiny::onStop and shiny::onStart. These allow having functions run when the application starts or exits, very useful to clean up and close database connections when the app exits.
server <- function(input, output){
  shiny::onStop(
    # callback function fired when app is closed
    function(){
      cat("App has been closed")
    }
  )
}
In jBox, these callback functions are included in the JSON of options; below the onClose event is fired when the notice is closed.
This raises one issue: one cannot truly serialise to executable code. The attempt below serialises the function to a string that will not be evaluated in JavaScript, just like "function(x){ x + 1 }" is not evaluated in R: it is not a function, it is a string.
# try to serialise an R function
jsonlite::toJSON("function(x){x + 1}", auto_unbox = TRUE)
#> "function(x){x + 1}"
One solution is to append the callback function to the object of options JavaScript-side.
tags$script("Shiny.addCustomMessageHandler(
  type = 'send-alert', function(message) {
    // append callback
    message.onClose = function(){
      // TODO send data back to R
    }
    new jBox('Notice', message);
});")
Placing a function inside a JSON object is expected in JavaScript, in contrast with R where though it works it is rarely if ever done (reference class/R6 are somewhat similar). The above JavaScript code to append the callback function could look something like the snippet below in R.
message <- list(content = "hello")
message$onClose <- function(msg){
  print(msg)
}
message$onClose("Closing!")
#> [1] "Closing!"
This explains how the event is used in jBox (and many other libraries), but the body of the callback used previously is empty and therefore will not do anything: we need it to send data back to the R server so it can be notified when the notice is closed.
This can be done by defining a simplified Shiny input. While the book will eventually cover fully-fledged Shiny inputs that can be registered, updated, and more, there is also a simplified version of the latter, which allows sending reactive input values to the server, where it can be used just like any other inputs (input$id). The value of the input can be defined using the setInputValue method, which takes the id of the input and the value to give it.
Below place Shiny.setInputValue('notice_close', true) in the body of the function so the input input$notice_close will be set to TRUE when the notice closes.
tags$script("Shiny.addCustomMessageHandler(
  type = 'send-alert', function(message) {
    // append callback
    message.onClose = function(){
      Shiny.setInputValue('notice_close', true);
    }
    new jBox('Notice', message);
});")
However, Shiny internally optimises how those values are set. First, if the input is set to the same value, then Shiny ignores it. This is fine if you are interested in the actual value of the input but will not work as expected if the input is to be used as an event. Indeed if you want to use this input in an observe, observeEvent, or eventReactive, you want it to be triggered every time the input changes, regardless of whether that value is the same as before. The second optimisation Shiny does is when the input is set to multiple different values before these have been processed, then only the most recent value will actually be sent to the server.
One can opt-out of these optimisations using the priority: "event" option when setting the input value, which is what we shall do here. We are not interested in the actual value of that input TRUE; we want to make sure the server gets notified every time a notification closes and given the aforementioned optimisations, it will not. The first time the event will be fired the input will be set from NULL to TRUE, but every subsequent notification that close will not fire that event since the value will not change (it’s always sending TRUE to the server).
tags$script("Shiny.addCustomMessageHandler(
  type = 'send-alert', function(message) {
    // append callback
    message.onClose = function(){
      Shiny.setInputValue(
        'notice_close', true, {priority: 'event'}
      );
    }
    new jBox('Notice', message);
});")
That done it can be incorporated into the application (Figure 11.7) built thus far. Something interesting could be done server-side, but to keep things brief and straightforward, we merely print the value of the input to the R console.
library(shiny)

ui <- fluidPage(
  tags$head(
    tags$script(
      src = paste0(
        "https://cdn.jsdelivr.net/gh/StephanWagner/",
        "jBox@v1.2.0/dist/jBox.all.min.js"
      )
    ),
    tags$link(
      rel = "stylesheet",
      href = paste0(
        "https://cdn.jsdelivr.net/gh/StephanWagner/",
        "jBox@v1.2.0/dist/jBox.all.min.css"
      )
    ),
    tags$script(
      "Shiny.addCustomMessageHandler(
        type = 'send-notice', function(message) {
          message.onClose = function(){
            Shiny.setInputValue(
              'notice_close', true, {priority: 'event'}
            );
          }
          new jBox('Notice', message);
      });"
    )
  ),
  textInput("msg", "A message to show as notice"),
  actionButton("show", "Show the notice")
)

server <- function(input, output, session){

  observeEvent(input$show, {
    # define notice options
    notice = list(
      content = input$msg,
      color = 'black'
    )

    # send the notice
    session$sendCustomMessage(
      type = "send-notice", message = notice
    )
  })

  # print the output of the notice_close event (when fired)
  observeEvent(input$notice_close, {
    print(input$notice_close)
  })
}

shinyApp(ui, server)
#> [1] TRUE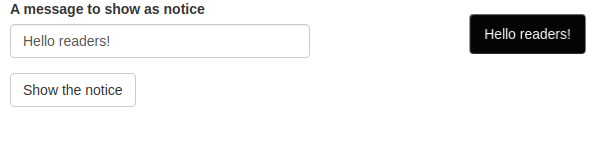
FIGURE 11.7: jBox final application
In the next chapter, we will build another application that makes use of bidirectional communication but also introduces a few more concepts to improve how such communication takes place and allows passing more complex messages from R to JavaScript and vice versa.
References
Chang, Winston, Joe Cheng, Alan Dipert, and Barbara Borges. 2021. Websocket: ’WebSocket’ Client Library. https://CRAN.R-project.org/package=websocket.
Cheng, Joe, and Winston Chang. 2021. Httpuv: HTTP and Websocket Server Library. https://CRAN.R-project.org/package=httpuv.