Chapter 21 Discover Webpack and NPM
In this chapter, we discover how to feature webpack and NPM in a straightforward Shiny project. The idea is not to build a complex application, only to find out how one might go about bringing them into an R project and observe some of their benefits (and potential issues).
There is a lot of depth to NPM and webpack; we only touch upon the surface here so we can obtain a basic setup for a Shiny application. We’ll eventually go into slightly more detail as this part of the book progresses, but it will by no means fully explore the realm of webpack. It’s always a good idea to take a look at the official documentation to get a better picture of the technology.
21.1 Installation
As Node’s Package Manager, a working installation of Node.js, is required, NPM ships with it. A bit like R in a sense where the package manager also comes with the language, install R, and you can install packages from CRAN with install.packages. The same applies here, install Node and you can install NPM packages from the command line.
We are only going to use Node.js indirectly, some of its functionalities and its package manager. This is not about building Node applications.
Below are some directions on how to install Node.js. In the event this does not work or you encounter issues please refer to the official website.
21.1.1 Mac OS
On Mac OS, the easiest way is via homebrew.
brew update
brew install node
Otherwise there is also an installer available.
21.1.2 Ubuntu
With Ubuntu one can install it straight from the package manager.
sudo apt install nodejs21.1.3 Windows
Download and install the official executable or use chocolatey.
cinst nodejs.installOr use scoop.
scoop install nodejs21.1.4 Other
If you are on another OS or Linux distro check the official, very concise guide to install from various package managers.
21.2 Set Up the App
Let us first put together a simple Shiny application that will serve as a basis for including webpack and npm. Create a new directory and in it place a file called app.R containing a very simple application.
21.3 Initialise NPM
With a simple application, one can initialise NPM. This could be translated into the equivalent of starting a new project in R. This is done from the command line, from the root of the directory that you want to use as a project.
Whereas in R we previously used the usethis package to create packages with create_package or projects with create_project, NPM does not create the initial empty directory where the project will be created; you have to create the directory first then initialise a new project.
An NPM project can be initialised with the command npm init, which when run prompts the user with a few questions, such as the name of the project, the license to use, etc. These have little importance for what we do here but will matter if you decide to publish the package on NPM. One can also pass the “yes” flag to the function to skip those questions: npm init -y.
This creates a package.json file, which is loosely equivalent to the DESCRIPTION of an R package; it includes information on the dependencies of the project, the version of the project, and more.
We will revisit this file later in the chapter. At this stage ensure you have run npm init (with or without the -y flag) from the root of the project (where the app.R file is located).
21.4 Installing NPM Packages
Unless the R programmer uses packages such as renv (Ushey 2020) or packrat (Ushey et al. 2018) then packages are installed globally on the machine, running install.packages("dplyr") installs a single version of dplyr across the entire device. Because CRAN is strict and its packages subsequently stable, it tends not to be too much of an issue. Packages submitted to CRAN are checked for reverse dependencies (other packages that depend on it) to see if the submission could cause problems downstream.
However, NPM does no such thing with packages that are submitted. Therefore the developer has to be more careful about dependencies, particularly versioning as packages can dramatically change from one version to the next. Thus it makes sense that NPM out-of-the-box advocates and provides tools to encapsulate projects. It is not recommended, to install NPM packages globally. NPM projects (the directory where npm init was run) come bundled with the equivalent of renv/packrat.
Installing Node packages also takes place at the command line with the install command followed by the name of the package to install, e.g.: npm install nameOfPackage.
As mentioned, it is rarely a good idea to install packages globally at the exception of very few packages, such as command-line applications used across the machine. As an example, the docsify-cli package for documentation generation can safely be installed globally as it is used at the command line in projects that don’t necessarily use NPM. This can be achieved with the -g flag that stands for “global”: npm install docsify-cli -g.
There are two other scopes on which packages can be installed. NPM allows distinguishing between packages that are needed to develop the project and packages that are needed in the final product being built.
R does not come with such convenience but it could perhaps be useful. For instance throughout the book we used the usethis package to develop packages from setting it up to adding packages to the DESCRIPTION file, and more. Perhaps one would like to make this a “developer” dependency so that other developers that pull the package from GitHub have usethis installed and readily available. The advantage is that this dependency would not be included in the final product, that is, usethis is not required to use the package (only to develop it) and therefore is not installed by the user.
As stated in the previous chapter, file size matters in JavaScript; it is, therefore, crucial that dependencies that are used only for development are not included in the final JavaScript file. With NPM this can be done by using the --save-dev flag, e.g.: npm install webpack --save-dev to install webpack. This is how it will be eventually installed as it is needed to prepare the final product (minify, bundle, etc.) but is not required to run the bundled file(s).
Finally, there are the “true” dependencies, those that are needed in the output we’re creating. For instance, were we to rebuild the gio widget using NPM we could install it with npm install giojs --save because this dependency will be required in the output file we produce.
Before moving on to the next section, let us install webpack and its command-line interface as developer dependencies.
Notice that this updated the package.json file and created the package-lock.json file as well as a node_modules directory to obtain the following structure.
.
├── app.R
├── node_modules
├── package-lock.json
└── package.json
The directory node_modules actually holds all the dependencies, and it will grow in size as you add more, it’s important that this directory is not pushed to whatever version control system you happen use (GitHub, Bitbucket, Gitlab).
Exclude the node_modules directory from your version control (Git or otherwise)
The dependencies are anyway not needed as one can pull the project without the node_modules then from the root of the project run npm install to install the dependencies that are listed in the package.json file. We can indeed observe that this file was updated to include webpack and webpack-cli as devDependencies, at the bottom of the file.
{
  "name": "name-of-your-project",
  "version": "1.0.0",
  "description": "",
  "main": "index.js",
  "scripts": {
    "test": "echo \"Error: no test specified\" && exit 1"
  },
  "keywords": [],
  "author": "",
  "license": "ISC",
  "devDependencies": {
    "webpack": "^5.2.0",
    "webpack-cli": "^4.1.0"
  }
}
The package-lock.json file is automatically generated and should not be edited manually. It describes the exact tree of all the dependencies. If you installed a package by mistake, you could uninstall it with npm uninstall nameOfPage.
Recap
- Install packages globally with
npm install package -g - Install developer dependencies with
npm install package --save-dev - Install dependencies required in the output with
npm install package --save - Uninstall packages with
npm uninstall package
21.5 Entry Point and Output
In general, an NPM project with webpack will make use of an src directory where the source code is placed and a dist directory (for distributed) where the bundled source code will be placed; we’ll see how to change these defaults later on. It will eventually be necessary as the src directory in R packages is reserved for compiled code (e.g., C++) and therefore cannot be used to place JavaScript files.
It will not be a problem here as we are not building a package.
Webpack will then require at least one “entry point.” An entry point is an input file in the src directory that webpack will use as a source to produce the bundle. Let’s create the go-to “hello world” of JavaScript; the snippet below creates the index.js file with a basic vanilla JavaScript alert.
The next section on configuration will detail precisely how to indicate to webpack that this is indeed the entry point it should use.
21.6 Configuration File
Webpack comes with a configuration file, webpack.config.js. Though for a larger project it is advised to split it into multiple configuration files (more on that later). This file can include numerous options, plugins, and other settings to customise how webpack transforms the entry point into an output, only some of which will be explored in this book as there are too many to cover.
Below is probably the most straightforward configuration file one may create. At the bare minimum, the configuration file will need to have an entry point specified; in this case, the previously-created index.js file. If no output path is specified, then webpack will produce it at dist/main.js automatically.
The module.exports line may confuse; it is covered in a later section on importing and exporting variables and functions.
21.7 NPM scripts
NPM scripts allow automating development tasks such as running unit tests, serving files, and more, we’ll set it up to run webpack. The scripts are placed in the package.json file and are terminal commands.
By default npm-init creates the following test script, which echoes (prints) a message stating that no unit tests were set up.
This script can be run from the terminal by typing npm run test. Those commands always follow the same pattern: npm run followed by the name of the script, in this case, test.
Adding the script to run webpack is very straightforward, we can add an entry called build that runs webpack.
So running npm run build produces the output file from the entry point file. However, we will modify this slightly in the next section as more features of webpack are uncovered.
21.8 Source maps
We will improve upon the previous section so we can run webpack on two different modes: one for production and one for development.
Since the output of webpack is any number of files bundled into one, it can make debugging more difficult. When files a.js, b.js, and c.js are bundled into dist/main.js, the stack trace will point to errors in dist/main.js, which is not helpful as the developer needs to know in which original file the bug lies.
Therefore, webpack comes with a “development” mode that allows including the “source map,” which maps the compiled code to the source files. This way, when an error or warning is raised JavaScript is able to point to the original line of code that causes it.
There are again many different ways to set this up in the configuration file as the source map can be placed in the bundled file itself, in another file, and more. However, the easiest way is probably to specify the mode using webpack’s CLI tool. The source maps are optional as these make the output larger and one wants to keep this output as small as possible for it to load as fast as possible in web browsers. Those will thus only be used while developing the project to trace back errors and warnings but will not be included in the final output for production.
Below we modify the scripts placed in the package.json file so two different scripts can be run: one for development and another for production.
"scripts": {
  "test": "echo \"Error: no test specified\" && exit 1",
  "build-prod": "webpack --mode=production",
  "build-dev": "webpack --mode=development"
}
This allows running npm run build-prod to produce the production bundle and npm run build-dev to produce the development version that includes the source map.
21.9 Bundle
One can then bundle the code using the scripts that we defined to produce the output bundle. Since we have not specified any output in webpack’s configuration file, it will create it at the default location dist/main.js.
We can then include the output of webpack in the Shiny application to test that all works well.
library(shiny)

mainJs <- htmltools::htmlDependency(
  name = "main",
  version = "1.0.0",
  src = "./dist",
  script = c(file = "main.js")
)

ui <- fluidPage(
  mainJs,
  h1("A shiny app")
)

server <- function(...) {}

shinyApp(ui, server)
Running the above launches the app, which presents the alert() that was placed in the index.js source file.
This makes for a great start but is not precisely interesting; in the following sections, we elaborate on this basic configuration to make better use of webpack’s feature and produce something much more fun.
21.10 Internal Dependencies
Let’s install a dependency and use it in our Shiny application.
We’ll install mousetrap, a library to handle key-strokes. We’re going to use it to hide the UI of the Shiny application behind a secret pass-phrase; it will only be revealed after it has been typed. This can be done by observing a specific set of key-strokes with mousetrap and set a Shiny input value when that particular sequence is typed.
This is by no means a safe way to secure an application!
Though it is certainly not a real-world example, it is educational and quite a bit of fun.
The first thing to do is to install the mousetrap dependency; as indicated on the GitHub README it can be obtained from NPM.
Note that we use --save as mousetrap will need to be included in the output we create, it’s not a library we import for development purposes.
21.11 External Dependencies
If dependencies with webpack have to be installed from NPM it begs the question; what about dependencies that are already included in the project and are not available on NPM.
For instance, this project is intended to work with a Shiny application, which comes bundled with jQuery, and the Shiny JavaScript library. First, the Shiny javaScript library is not available on NPM. Second installing it would result in duplicating dependencies, which is hardly best practice. Thankfully webpack comes with a simple mechanism to handle these cases; external dependencies can be added to the configuration file under externals.
The above will allow importing the Shiny object in scripts, which is needed to set the input value with Shiny.setInputValue; hence Shiny must be accessible in webpack. Let us delve into the import/export mechanism.
21.12 Import and Export
To demonstrate how webpack enables modularising code, we will not place all the code in the index.js file. We create two other files: secret.js and input.js. The first will contain the pass-phrase and the second will have the code to handle the key strokes via mousetrap and set the Shiny input. This will enable using the pass-phrase in multiple places without duplicating code.
Therefore, as shown in Figure 21.1, the entry point index.js needs to import the input.js file, which itself imports the pass-phrase from secret.js.
FIGURE 21.1: Webpack with Shiny
Again, there are multiple ways to import and export modules, functions, variables, etc. This book will use the ES6 syntax as recommended by webpack. Though this mechanism is present in other languages, such as Python (where it somewhat resembles ES6), it will take some getting used to for R programmers as though this language features some form of import (library()) and export (@export roxygen2 tag), this differs significantly from how it works in webpack. This is, however, key to using webpack, as it is what ultimately enables the creation of modules that make code more robust.
There are two different kinds of exports and imports possible, “named” and “default.” We shall cover them in that order.
21.12.1 Named
Let’s place the variable secret in the secret.js file. As a reminder, this variable will have to be imported by in another file (input.js) where it will be used to check if the pass-phrase typed by the user is correct.
Declaring the variable itself does not change, we use the keyword let to declare a variable named secret that holds the pass-phrase. The issue is that with webpack, this variable will be internal to the file where it is declared. However, we ultimately want to import that variable in another file. To do so, we can place the keyword export in front of the declaration to indicate that this variable is exported from the file. Note that this will also work with functions and classes, and other objects.
Placing export in front of an object constitutes a named export; the secret.js file explicitly exports the variable named secret.
Then this variable can be imported in the input.js file. The named export in secret.js comes with a corresponding named import in input.js to import the variable named secret; this is indicated by the curly braces. Note that again we include the path to the file (./secret.js), importing from secret.js without the path will fail.
The curly braces are used for named imports as multiple such variables or functions can then be imported, e.g., import { foo, bar } from './file.js'; to import the named exports foo and bar from file.js.
21.12.2 Default
An alternative would be to use a default export. A file can have a default export; said default could be a variable, a function, a list, or any number of things but there can only be a single default export per file.
Rather interestingly, because multiple variables can be declared on a single line (e.g., var a,b,c;) but only a single default can exist, the default export and vriable declaration cannot be placed on a single line.
// invalid
export default secret = 's e c r e t';

// valid
var x = 0,
    y = true;

export default {x, y}
This only applies to variables as only a single function can be declared by line so declaring a function and its default export on athe same line is valid.
Importing default exports in other files resembles all too much the syntax of named imports, which may lead to confusion: it’s essentially the same omitting the curly braces.
21.12.3 Wrap-up
We’ll be using a named export method in secret.js. The same general logic can be applied to import the external dependency Shiny as well as mousetrap.
import Shiny from 'shiny';
import { secret } from './secret.js';
import Mousetrap from 'mousetrap';

Mousetrap.bind(secret, function() {
  Shiny.setInputValue('secret', true);
});
Finally, remember to import input.js in the entry point index.js.
This can then be bundled with npm run bundle-prod, which will start at the entry point (index.js) observe that it imports the file input.js, then look at that file and see that it imports secret.js; webpack builds this dependency tree and includes all that is needed in the bundle.
This can be used in the Shiny application, which we modify so it listens to the secret input and only when that input is set renders a plot and a message.
library(shiny)

mainJs <- htmltools::htmlDependency(
  name = "main",
  version = "1.0.0",
  src = "./dist",
  script = c(file = "main.js")
)

ui <- fluidPage(
  mainJs,
  p("Type the secret phrase"),
  uiOutput("hello"),
  plotOutput("plot")
)

server <- function(input, output) {
  output$hello <- renderUI({
    req(input$secret)
    h2("You got the secret right!")
  })

  output$plot <- renderPlot({
    req(input$secret)
    hist(cars$speed)
  })
}

shinyApp(ui, server)
Once the application is launched the user can type the phrase secret to see the content of the application (see Figure 21.2).
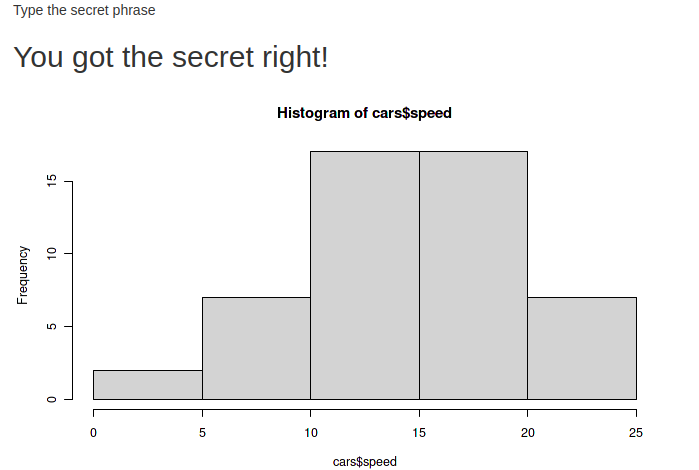
FIGURE 21.2: Mousetrap example
That is it for this chapter. As stated multiple times there is far more depth to webpack, but this is outside the scope of this book, instead in the next chapter we discover an easier way to set up such projects and make R and webpack work in a more seamless fashion.
References
Ushey, Kevin. 2020. Renv: Project Environments. https://CRAN.R-project.org/package=renv.
Ushey, Kevin, Jonathan McPherson, Joe Cheng, Aron Atkins, and JJ Allaire. 2018. Packrat: A Dependency Management System for Projects and Their R Package Dependencies. https://CRAN.R-project.org/package=packrat.